TokenPocket App Setup
Configure a CatFee Seamless Energy HTTPS node in the TokenPocket mobile app and verify your first transaction.
The TokenPocket mobile app supports custom TRON nodes. After selecting a CatFee Seamless Energy node, the wallet continues signing transactions locally, while the node prepares ENERGY or BANDWIDTH as required before broadcasting the original transaction.
TokenPocket uses the Seamless Energy HTTPS node. Enter the complete URL https://{NodeSlug}.catfee.vip; do not use the plaintext gRPC address intended for the TronLink mobile app.
Before you begin
Open Seamless Energy in the CatFee User Center and confirm that:
The node is enabled
You have obtained the HTTPS node URL,
https://{NodeSlug}.catfee.vipBound address authentication is selected
The current TokenPocket wallet address is bound to the node
Bound address authentication is recommended because TokenPocket's custom-node form only asks for a node name and URL; it does not provide a field for CF-NODE-KEY.
Setup steps
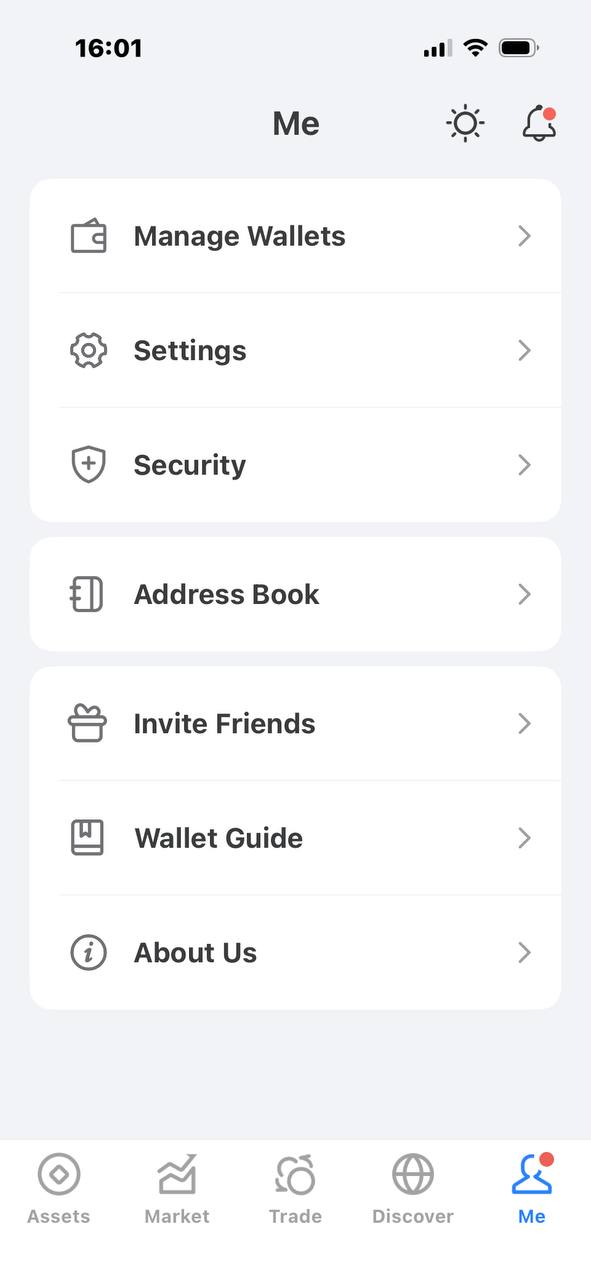
1. Open “Me”
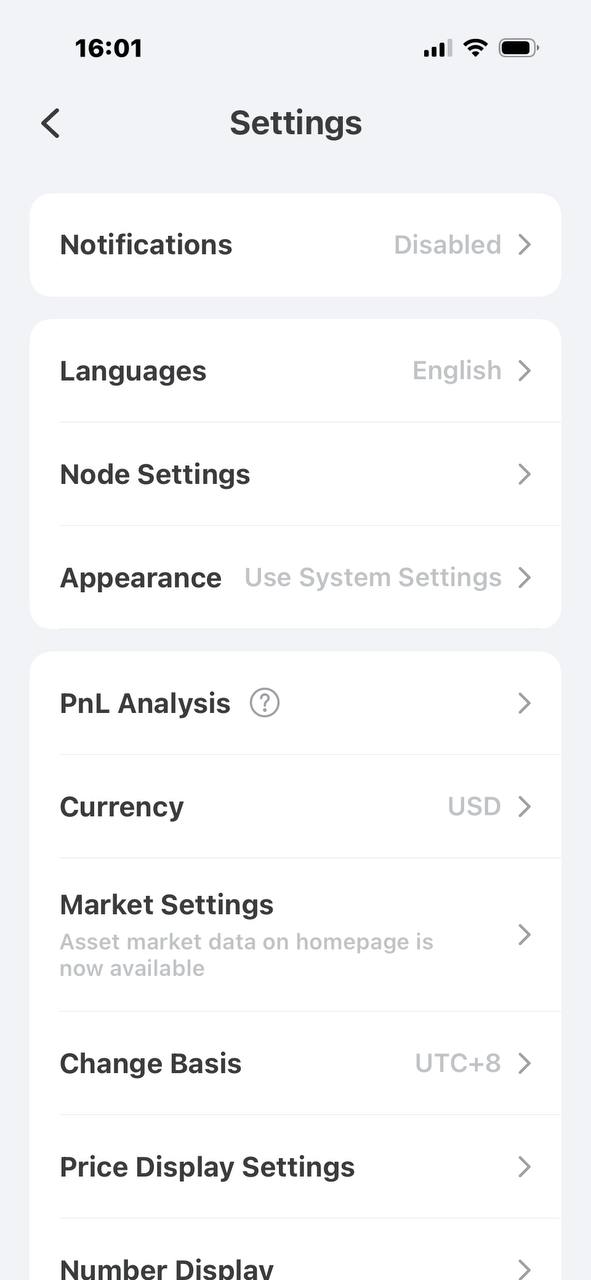
Open the TokenPocket app, tap Me at the bottom, then tap Settings.

2. Open “Node Settings”
On the Settings page, tap Node Settings.

3. Add a custom TRON node
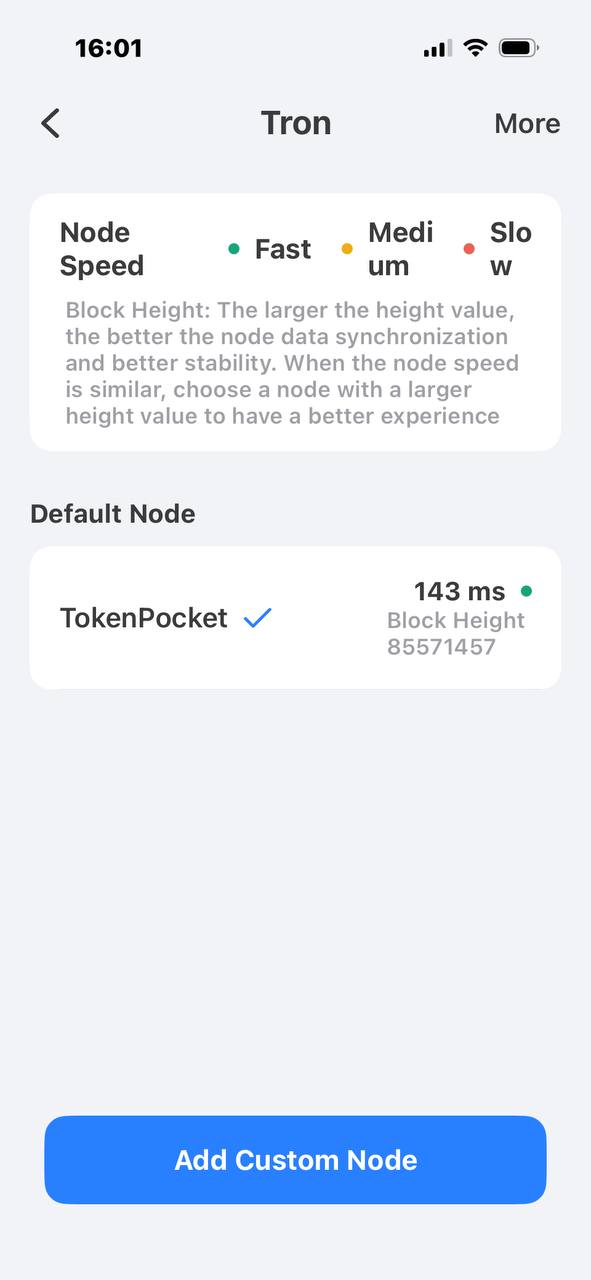
Make sure the page title is Tron, then tap Add Custom Node at the bottom.

4. Enter the node information
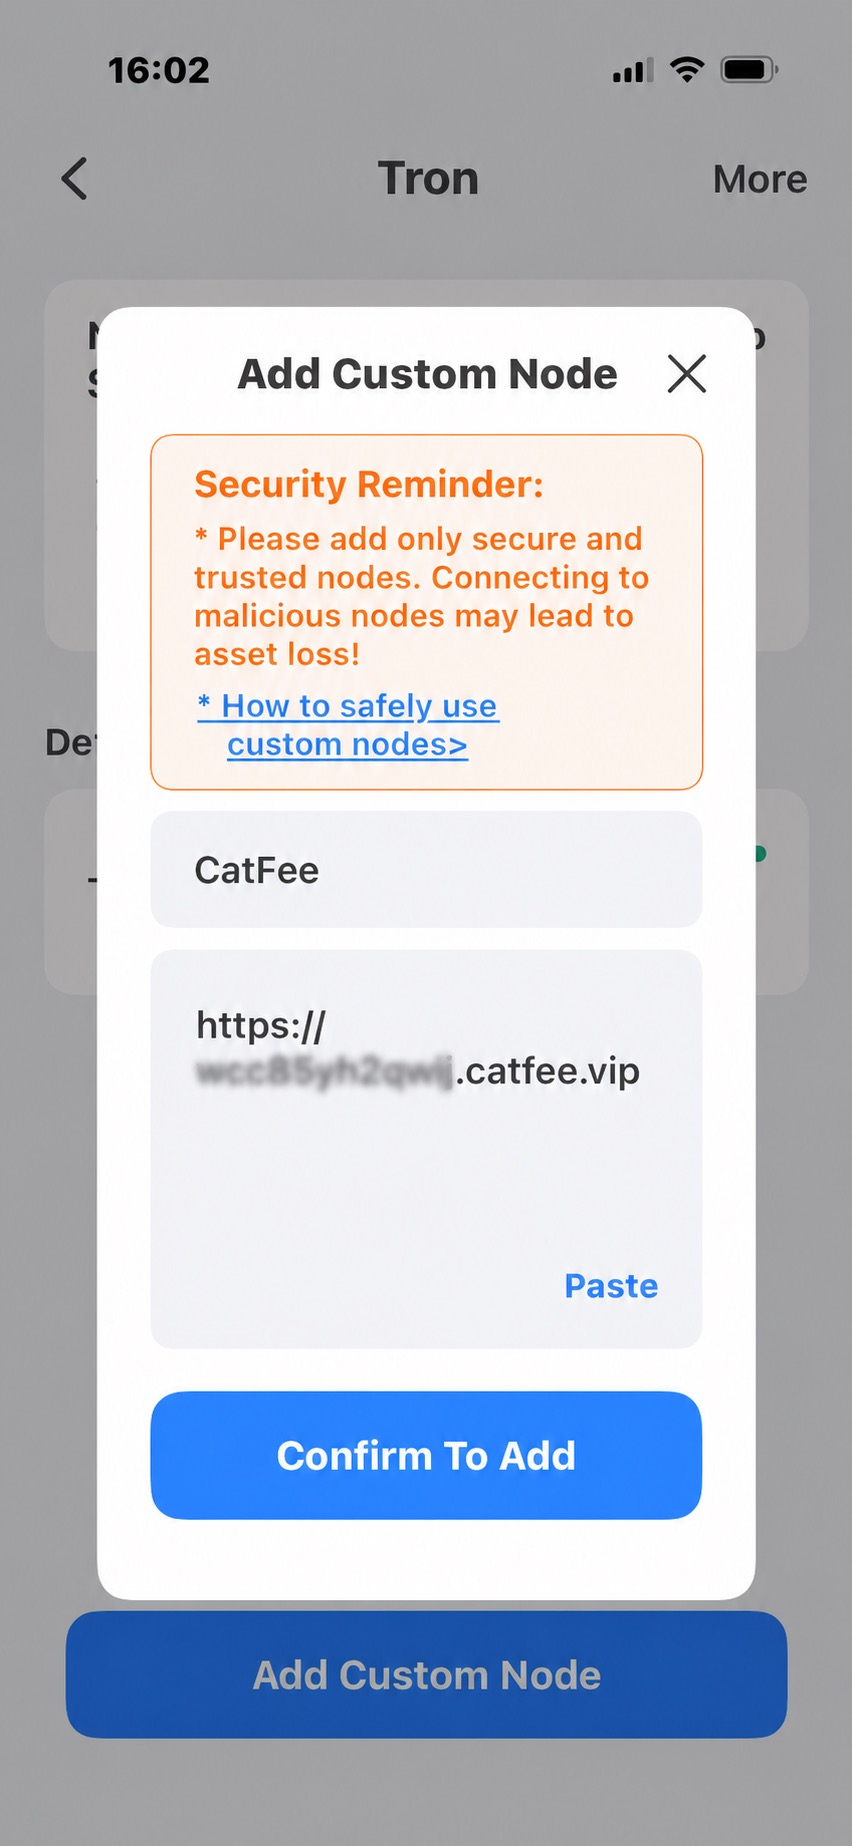
In the “Add Custom Node” dialog, enter:
Enter the complete URL, including https://. TokenPocket does not require a separate port for this HTTPS endpoint.
Review TokenPocket's security reminder and confirm that the URL matches the node shown in the CatFee User Center. Then tap Confirm To Add.

5. Select the custom node
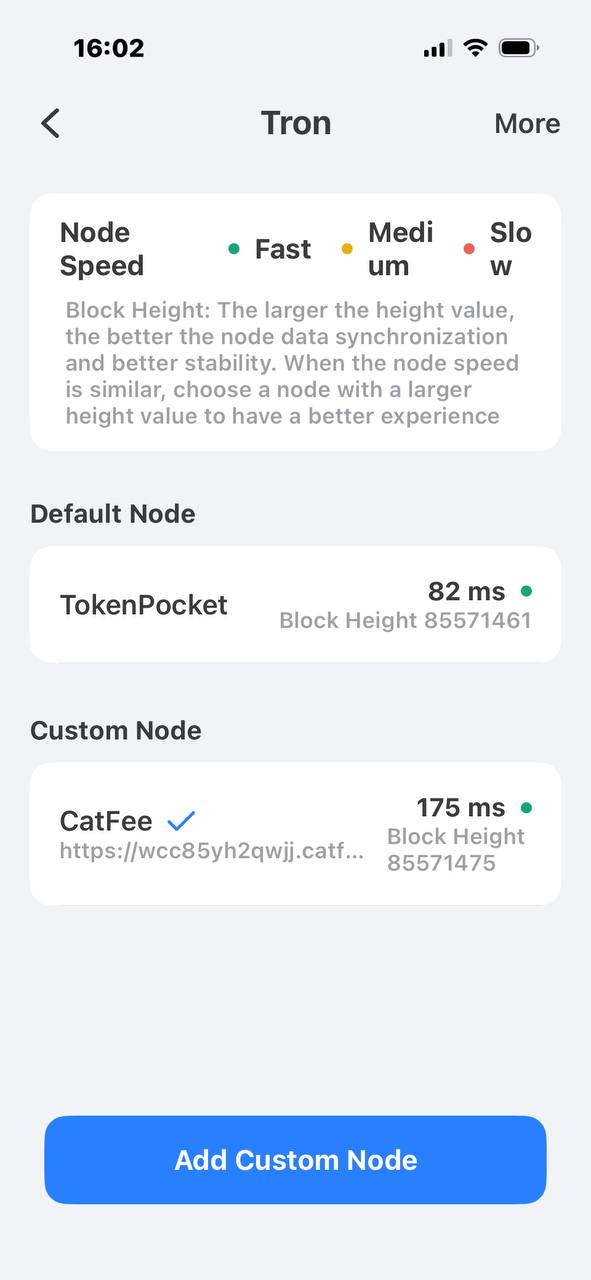
After adding the node, find CatFee under “Custom Node.” It should display a check mark as the active node. If it is not selected, tap it to switch to the new node.
You can also verify the selection using the node name and the .catfee.vip URL displayed in the list.

Switching nodes does not change your wallet address or assets. Transactions are still signed locally by TokenPocket.
6. Send a small test transaction
Start with a small transaction:
A small TRC20 transfer to verify ENERGY preparation
A small TRX transfer to verify BANDWIDTH preparation
After confirming that the transaction can be signed, broadcast, and recorded on-chain successfully, you can use the node for everyday transactions.
Confirm the setup
TokenPocket shows the CatFee entry as the selected custom node
The wallet signing flow remains unchanged
Transactions broadcast normally and return results
The corresponding resource processing or usage record appears in the CatFee User Center
Common questions
Should the node URL include
https://? Yes. Enter the complete URL:https://{NodeSlug}.catfee.vip.Do I need to enter a port? No. TokenPocket accepts the complete HTTPS URL and does not require a separate port for this node.
Do I need to enter an API KEY? Not when using bound address authentication. Make sure the current TokenPocket wallet address is bound in the CatFee User Center.
What does TokenPocket's security reminder mean? Custom nodes can see the public contents of transactions sent through them. Only use the node URL obtained from the CatFee User Center, and verify it before adding the node.
Will switching nodes expose my private key? No. The private key remains in TokenPocket, and only signed transactions are sent to the node.
What should I check if the test transaction fails? Confirm that the node is enabled, the complete HTTPS URL is correct, the CatFee node is selected, the wallet address is bound, and the CatFee balance is sufficient.
Return to Wallet Integration, or read Security to learn about private-key and transaction security boundaries.
Last updated